Reveillark Bounce Combo, in UWr, Bant, and WUrg

Pure shenanigans!

Pure shenanigans!

Introduction:

Reveillark is one of the last cards in small cube lists that allows for combo decks to be drafted. This is because the Reveillark combo does not require direct crafting by the cube designer, but rather it occurs passively from choosing the most powerful cards for a cube. The cards that interact with Reveillark and Reveillark itself are powerful cards that have earned their spots in the cube on their own merit. Thankfully, this means we still can draft a fantastically fun and powerful combo deck in most cubes!

Deck Strategy:

The Reveillark combo relies on abusing Reveillark’s reanimation ability to create an infinite cycle of reanimates. Traditionally, this was achieved by combining Reveillark, Body Double, and Mirror Entity. In both U/W and U/W/r (with Greater Gargadon) shells this deck was a force in Time Spiral-Lorwyn standard.

The combo

The combo

The combo works like this: The Body Double comes into play (from hand or graveyard) and copies a Reveillark. The Mirror Entity’s ability to make creatures x/x is activated 30 or so times at 0. The first Entity trigger is resolved, killing all of the player’s creatures (they are now 0/0). Body Double heads to the yard and its copied Reveillark ability triggers. The Body Double can now target itself, and another 2 or lower power creature – often a Venser, Shaper Savant or Riftwing Cloudskate, Mulldrifter to dig, or even a Mogg Fanatic. Then they come back to play and you activate the next Mirror Entity Trigger. The opponent is now either dead or completely locked out.

While Body Double and Cloudskate no longer makes the cut in today’s cube environment, there are several other cards that fill the void to abuse Reveillark’s extremely strong ability. The other pieces of the combo are also in most cubes, allowing players to draft this potent combo deck.

However, while the Reveillark combo was very powerful for these decks, they were built from the ground up based on synergy and grinding out value. We will be taking a similar approach in how build ours and play it, abusing blink and bounce effects to capitalize on a variety of 187 creatures and other CIP effects.

Cube 'Lark Combo

Cube ‘Lark Combo

In the cube, the Combo will revolve around Reveillark, Mirror Entity, and Karmic Guide.These three cards plus a Venser or Fanatic is enough to combo out. You can use clones and a sacrifice outlet that leaves Reveillark in play (Gargadon) to also go infinite

The only question that remains for drafter’s is what colours to go into. But first…

Key Picks – Assembling the Combo:

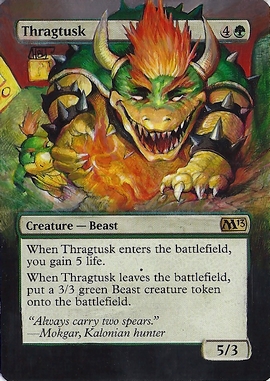
  • Reveillark: Obvious card is obvious, and you will have likely picked this up in pack one. If you do not see Reveillark in your draft, do not dispair! The deck can still be very strong and synergistic without it.
  • White Combo pieces: Reveillark combo in the cube can be built in a completely mono-white shell. The key pieces from white are Mirror Entity and Karmic Guide. With just these pieces and a card like Triskelion you can assemble the combo. Or go infinite life with Lone Missionary.
  • Blue Combo pieces: Phyrexian Metamorph (which you should pick up regardless of colour choice) and Phantasmal Image can both fill the role of Body Double and allow you to go infinite. However, they will need Gargadon to combo out (Reveillark needs to stay in play). Blue has a wealth of low power creatures to abuse for value, but you will want Venser, Shaper Savant to finish off the combo.
  • The three armed menace

    The three armed menace

    Red Combo Pieces: Red’s Greater Gargadon is a sacrifice outlet, and red has access to Mogg Fanatic to finish off players. Gargadon is a first pick if you are using clones for the combo and should be splashed even if you are playing Bant.

  • Green: Acidic Slime can close down games quickly if you can deal with their creatures.
  • Artifact: Triskelion can also finish out the game and goes into any deck

Drafting Strategy – Choosing your colours:

Besides opening a Reveillark, the most difficult drafting decision is choosing what colours to play in addtion to white. Final deck lists can end up forming into Bant, Boat Brew, Naya, U/W control, U/W/r, and even 4 colour control. Each colour choice has it merits, but the more colours involved the more draft picks need to be allocated to the manabase.

Gandalf's most recent eagle didn't come as ordered...

Gandalf’s most recent eagle didn’t come as ordered…

For the purpose of this primer, the build that we will be focusing on is U/W/x, examaning both red and green in that x slot. This is because the most potent synergies and combo pieces can be found in blue, red, and green. Furthermore, the deck will need three or even four colours to have enough redundancy to pull the combo off (hence, I will not elaborate on 2 colour versions).Contemplating combo decks in general, they often cannot succeed in the cube because the singleton format creates a lack of redundancy to combo off at a regular frequency. Thus, when drafting a combo deck such as Reveillark, the most important goals will be to assemble ways to artificially create that redundancy and to build a deck that can win with or without the combo.

That being said, there are two paths to build this deck. As a control deck that uses the mass removal of white and red to keep you alive until your blue spells find your combo, or as a bant-bounce setup that capitalizes on synergy to grind out games. Often you will find yourself playing something in between these two styles, running many creatures and packing a decent suite of removal. Also, you might end up playing all four colours, as many of these spells are quite splashable and needed to make the combo work (such as Gargadon).

Key Picks – Colour choices:

Lets go over the cards you can draft by colour, dividing choices between a controlling or bounce style of deck. Specifically, we will be looking for come into play (CIP) creature effects (and not just ones that are targeted by Reveillark), cards that create artificial combo redundancy, and cards that keep us alive/protect the combo (nothing worse than having your Reveillark exiled….).

White: Besides having the key combo pieces, there is a lot of value in the various white cards available.

Enchantment removal is at its best in a blink deck

Removal attached to permanents is at its best in a blink deck

  • Control Cards: The wrath variants are all extremely potent, as are the various spot removal cards – especially Oblivion ring and Faith’s Fetters.
  • Search/combo redundancy: Land Tax/Scroll Rack will aid in your efforts to find your combo. Also nice if you get some miracles in your deck.
  • Combo Protection: Mother of runes,  Mana Tithe.
  •  CIP creatures: There are a tonne of cards to choose from for the blink strategy.

Blue: In this deck Blue serves several roles – it protects the combo, draws the combo, provides excellent bounce options, and has great CIP creatures. A tonne of these cards overlap between categories, and illustrate how wonderfully synergistic this deck can be.

  • Plotting your slow demise.

    Plotting your slow demise.

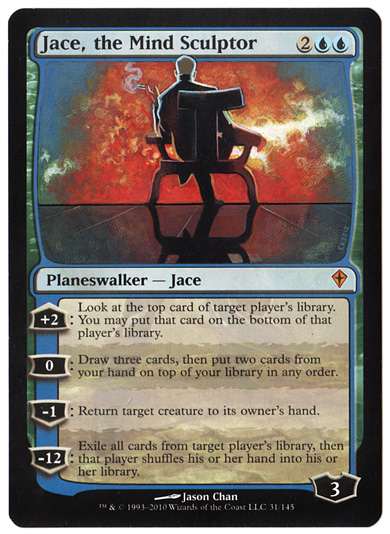
    Control Cards: Hard counters, especially splashable ones. Cryptic command can also be quite good, but hard to cast. These will also be your key combo protectors. And lets not forget about Jace TMS, who interacts beautifully with your cards in addition to controlling matches.

  • Search/Combo Redundancy: Blue has a tonne of search. Gift’s Ungiven interacts well with your deck, filling up the yard with a bounty of targets for Reveillark and the ‘Lark itself.
  • Combo Protectors: Aside from counters, you have access to some great CIP creatures that also protect your combo resolution. Vendillion Clique is an aggressive option, and Venser can also be used here to great effect. Glen Elendra is another solid choice.
  • CIP creatures: Wow, some of the best. Clique and Venser are already mentioned, but cards like Sower, Mulldrifter, Man’O’War, and the clones are all fantastic. D
  • Bounce: Don’t forget about Crystal Shard to grind out that value!

Red: Red does not offer a lot of cards for protecting the combo, but many of the cards can help keep you alive or aid the Reveillark combo (mentioned above).

Fire in the hole!

Fire in the hole!

  • Control Cards: Red offers a powerful suite of removal. You will be looking for cards that are easy to splash, such as Arc Lightning and Earthquakes.
  • Search/Combo Redundancy: Hello Imperial Recruiter!!! Sneak Attack also plays very well some versions of this deck, depending on your curve and creature count.
  • CIP creatures: Not a huge amount that is abused just by Reveillark. If you are splashing red into a bounce build (or picked up the artifact bounce), you can look at Inferno Titan, Fire Imp, and Manic Vandal

Green: While green lacks combo pieces, the colour brings a lot of utility, synergy, and resiliency to the deck. The search, CIP creatures, and pure synergy in a BANT bounce deck is absurd. Including green will give you whole new lines of attack for the deck.

  • Let's be honest, your in green because you were passed her.

    Let’s be honest, you’re in green because you were passed her.

    Control Cards: This is green…. But you can find some artifact/enchantment removal options.

  • Search/Combo Redundancy: This is why we want green. Several cards can act as Reveillark 2-4, searching up our prized creature and also rescuing it if it gets stuck in our yard. Specifically, you want Survival of the Fittest, Worldly Tutor, Regrowth Effects, Genesis, and Sylvan Library (quite hilarious if your messing about with lifegain CIP creatures).
  • CIP creatures: Welp, you will have access to great value and cards that interact with the combo. The beefy army-in-a-can cards like Deranged Hermit love Revillark, while huge scary threats like Kalonian Hydra can get quickly out of hand (think about searching for him with imperial recruiter as well…). And, of course, Eternal Witness is a VERY high pick for this deck.
  • Mana fixing: Lets not forget about Birds, Cultivates, or the newly minted Sylvan Catarid.

Guild: Some fantastic cards in here, lets just go over the best ones:

Artifact: Erratic portal is a must grab, and a few other options:

  • Let the shenanigans commence!

    Let the shenanigans commence!

    Mana-fixing: Nothing wrong with rocks that fix colours

  • Equipment: 1 piece of equipment can be very good if you have a decent saturation of dorks. But you need to save a lot of slots for other cards.
  • Creatures: Phyrexian Revoker and Sad Robot are both fine bounce targets.
  • Utility: Bounce and deck manipulation. Erratic Portal is bounce engine #2. You can also do fine with Mimic Vat. And of course you should pick Top and Scroll Rack.

Draft Strategy:

That was a tonne of options to look over, lets see how we should go about drafting them. With either BANT, WUr or 4 colour you are prioritizing:  1) Picking the combo pieces, clones, and finishers, 2) Bounce engines 3) mass and spot removal, 4) CIP creatures, 5) Tutors/draw (often as CIP creatures).

Gandalf and the Tardis? Your opponent is screwed.

Gandalf and the Tardis? Your opponent is screwed.

In each case just keep in mind good drafting principles (balancing amounts of removal, curve, answers, search, creatures, etc) and focus on what cards you need to make the combo actually work.

Breaking it down further into how the deck would look after a draft you would want the following:

  1. 5+ slots for your Combo (‘Lark, 1-2 Sac Outlets, Clones and/or Karmic Guide, 1+ CIP finisher)
  2. at least 5 Dual lands (the more the better)
  3. 2-4 Pieces of Mass removal
  4. 2+ Pieces of spot removal (in permanent form if you can!)
  5. 2+ Bounce engines, or CIP creatures with blink
  6. 7+ CIP creatures, prioritizing lower curve creatures such as draw walls.
  7. 2+ Tutor/Draw spells (Imperial Recruiter and Mulldrifter especially)
  8. 1-2 Finishers like Sun Titan, Inferno Titan or Kalonian Hydra
  9. And the remainder a mix of other powerful cards.

Perhaps more important is to know when to draft this deck. Obviously, if you open a Reveillark, feel free to build around it. Otherwise, I recommend you start from either a U/W control or Bant bounce shell and add the combo pieces as they show up, That way you are focusing on building a good deck that will run well even if you end up missing a few combo pieces.

Weaknesses:

You really don't want to deal with kitties, 'geddons, and exiles.

You really don’t want to deal with kitties, ‘geddons, and exiles.

Each version of the ‘Lark combo will have specific weaknesses. For U/W/r you are playing control and can be vulnerable to very fast aggro decks. However, you should still have a decent selection of CIP creatures to combat them with. With the Bant bounce version, your deck becomes more midranged but then you are at risk of losing to control with well timed counters or removal effects. In either case, it sucks to face other white decks packing exiles.

Conclusions:

Combo in general has a hard time being represented in cubes as it requires supporting a lot of lackluster cards. Thankfully Reveillark’s ability gives us so many options and interactions with a tonne of other very strong cards. Whether you build a controlling shell or a more mid-range deck, you should have a lot of fun trying to pull of the combo. And the worst case scenario where you don’t get the ‘Lark or another piece of the combo, you still will have a very good midrange/control deck.

Sadly not in my cube right now, but fantastic if you run it.

Sadly not in my cube right now, but fantastic if you run it.

Deck List Examples:

UWr ‘Lark Combo

Green heavy ‘Lark Combo

Bant bounce no Combo (it happens)

4 Colour lifegain combo

4 Colour again

Naya Lightsaber – Lifegain Midrange

The aggro annihilator!

The aggro annihilator!

Introduction

Naya lightsaber has been around since the printing of Wild Nactal, but it took center stage during the 2009 Worlds. There it beat out the all-powerful Jund decks to capture the top spot. A slick combination of powerful 1 drops, burn, Ajani Vengeant, and Baneslayer angel, this is a deck that plays fierce aggro creatures within a mid-range shell. Nevertheless, the majority of critical spells reside in the four mana slot, which results in the deck playing more like a mid-range deck than an aggro build. In the cube, you may find yourself drafting this deck if you opened or obtained a very early Ajani Vengeant, Baneslayer Angel, Thragtusk, or even Wild Nacatl.

"Bwa Ha Ha!"

“Bwa Ha Ha!”

Deck Strategy:

        The goal of this deck is to play the best cards across the three Naya colours, which results in a highly synergistic pile of face-stomping, life-gaining, mid-range craziness. Naya Lightsaber crashes out of the gates with Wild Nacatl caliber one drops and mana dorks, follows that up with powerful three drops, four drops, and seals the deal with life-gaining five drops. While throwing down all this creature power, the deck runs a suite of burn and removal, along with a few planeswalkers such as Ajani Veng ant and Elspeth 1.0.

        This deck beats up on aggro quite well, and takes apart any deck that cannot compete with its combination of efficient beats, lifegain, and removal. For control matchups, this deck will want to mulligan for 1 drops, shifting its role to that of an aggro deck that rides on the coat-tails of Nactl and friends. Against other mid-range decks, this deck packs a wallop of potent mid-game creatures, and can grind out matches with its removal and lifegain.

Key Picks:

  • Wild Nacatl + Friends (One drops) – These will put you into this deck, and justify the colour combination (Kird Ape, Loam Lion, Figure of Destiny, Savannah Lions).

    Ice cold mana fixing

    Ice cold mana fixing

  • Dual Lands – Three colour decks require a prioritization on mana. City of Brass will do some serious work in this deck.

  • Guild Spells – These may wheel, but it is often a safe bet to draft the highly sought over cards such as Ajani Vengeant or Bloodbraid Elf right away. These cards make or break your deck.

  • Burn – A suite of burn spells to clear the way. Starting with Lightning helix, and moving onto bolts and dividable burn spells.

  • Spot Removal – Because this deck will go into the later stages of the game, swords and path to exile will help against larger creatures.

  • Mana dorks – Hierarch and Birds are the best, but the others will help you cast the various naya spells.

    Well... no duh

    Well… no duh

  • Two Drops – Try to get stoneforge mystic, pridemage, and tarmogoyf. Otherwise focus on three and four drops, using mana dorks to ramp up.

  • Three and Four Drops – Just grab aggressive creatures that are easy to cast in terms of colour. Ranger of Eos and FTK, for example, are very, very strong in this deck.

  • Baneslayer/Exalted Angel, Thragtusk and other five drops – After you pick up a few three and four drops, make sure to grab these angels or other flyers to top the curve off and finish the game. Lifelink is especially important for this deck, so try to get the angels/thragtusk.

  • Equipment – Equipment can be quite strong in any creature based deck, but this deck really wants Batterskull!

Draft Strategy:

Grom! Grom! Grom!

Grom! Grom! Grom!

Drafting a three colour mid-range deck requires a focus on spell curve and maintaining the proportions of casting costs of your creatures. This starts with drafting 4-5 one drops that are similar to Wild Nacatl in power and function. Next, make sure to pick up a few mana dorks, especially Noble Hierarch, so that you can reliably play your higher cc spells. While this deck does not revolve around two drops, do not pass up very strong cards like Tarmogoyf or Stoneforge Mystic. Curve up into the 3cc slot with around 2-3 creatures such as Kitchen Finks, Troll Ascetic, or Mirran Crusader. Next, grab 2-3 more for the 4cc slot, especially Bloodbraid Elf, Ranger of Eos, FTK, and Exalted Angel (yes, she is a four drop). Finish this off with 2-3 5cc creatures, focusing on those that have lifegain – like Baneslayer Angel, Thragtusk, and Batterskull.

Meow?

Meow?

With a well rounded creature curve in place, you can also focus on drafting key removal spells. Try to pick up three burn spells and three spot-removal spells. In addition, grab 2-3 planeswalkers, especially Ajani Vengeant. He is a critical part of this deck, and does everything you could want. Meanwhile, also continue to grab dual lands, and also pick up a Slayer’s Stronghold if it tables.

This build can also be adjusted into a more aggro shell if you are not seeing any finishers, with your curve ending at three or four instead of five and including more one and two drops. This style of deck is often referred to as Zoo. It plays a huge amount of 2/x’s and burn spells to quickly dispatch opponents. However, in an aggro shell their is more impetuous to draft lands so you can play your cards right away and maintain pressure. Either way, Naya is an excellent deck to craft.

In summation, your goal is to build a deck that focuses on lifegain, strong beaters, Naya synergy, planeswalker support, and an excellent removal package. Make sure to draft the lands you need, and try not to make your curve too top heavy.

Weaknesses:

The main weakness for this deck and a lot of other midrange decks is control decks that go bigger. Try to use your removal well, and pick up some land destruction for the sideboard to bring in against control or other late-game decks. Without access to discard, permission can be crippling, so a Thrun may also be a valuable pick up for control matches.

Conclusions:

Naya Lightsaber is a very specific deck to draft, and may not always be the best pick. It’s reliance on lifegain creatures and cards that are highly drafted by other decks make it vulnerable to being ‘hated’ out by accident. Nevertheless, the deck itself is very strong, as the three colours can come together to form a fantastic midrange build that beats up on aggro with ease. With the power and prevalence of level of aggro decks constantly rising in the cube, Naya Lightsaber (a.k.a. KITTIES) might just be a deck you want to draft at your next cube event.

KITTIES!!!!!

KITTIES!!!!!

Sample Deck Lists:

Lots of one drops

One drop screw… but Jitte!

Naya AGGGGRRROOOO

Aggro Pox/SUI

"Disgusting little creatures..."

“Disgusting little creatures…”

Introduction

Also known as suicide black, or ‘Sui’, the Aggro Pox strategy combines black’s recurring creatures with powerful symmetrical and suicidal effects like Pox. A very black-heavy deck, this aggro strategy applies disruption, creature kill, and efficient, recurring weenies to kill the opponent while keeping them from progressing their board. In the cube, you may want to draft this deck if you have pack one access to cards like Braids, Bitterblossom, or see a lot of black weenies tabling.

Deck Strategy:

Ideally, the strategy is to play a series of early recurring threats, which is followed up by a timely pox, discard, sinkhole, braids, or even Winter Orb/Tangle Wire. The goal is to extract as much value out of your ‘pox’ cards as possible by playing cards that turn otherwise symmetrically harmful cards into one sided blow-outs. Ultimately, you will attempt to lock (albeit a soft-lock) out your opponent with a series of pox-style cards – creating an environment where only your cards can exist.

hymn

The pinnacle of disruption

While the deck will lack aggro red’s burn, or white’s pump, the sheer power and synergy of cards like Geralf’s Messenger, Hymn to Tourach, Bitterblossom, Dark Ritual, and your Pox effects should overpower the opposing player. While this deck will not be as blazingly fast as RDW, it will still play as an aggro deck against the rest of the field. Most of the deck will be under 4cc, but you will often be playing a higher CC spell such as Tombstalker.

Key Picks:

  • Green Splash
    • Cards like Life from the Loam, G/B removal, and graveyard manipulation can be quite helpful.

Draft Strategy:

Drafting BBB aggro requires an early commitment in pack one. Often, you will open or be passed a Bitterblossom, Braids, or another strong black card to put you in black. Acting quickly, your goal is to draft a mass of recurring creatures like Bloodghast, while sniping other cards that work towards the deck’s theme. Pay attention to how many zombies you have, as Gravecrawler is a must pick.

It's been a while since we had a block this good for black.

To abuse the type of creatures you will be drafting, you are going to want to draft at least 3-4 forms of symmetrical sacrifice cards. Draft cards like Braids, Liliana, and Smokestack quickly, as their permanent board presence can be more valuable than a one-time pox. Nevertheless, any combination of these will do, as long as you have enough permanent based ‘pox’ effect and spell versions.

One of the best cards to splash.

One of the best cards to splash.

While you are securing weenies and ‘pox’ effects, also draft cards that play to the decks strength. These include sac outlet cards such as Greater Gargadon, or discard machines like Masticore and Pack Rats. If you start bringing in more discard outlets, be sure to draft Crucible or Squee if you see them. Lastly, get hand and land disruption, and don’t shy away from tutors or Imperial Recruiter.

Weaknesses

This deck has trouble with very fast RDW builds, as well as artifact/ramp decks that can easily replace their damaged mana bases. Also, this deck can be a bit tricky to draft, as lot of the core cards in black are easily splashed in a variety of other decks (looking at you Mind Twist!). FInally, keep the average CC low, and the deck should have decent percentages against the field.

Conclusions:

Suicide/Pox black can be very challenging to draft, but very rewarding to play. The strategy requires a lot of support, and will fall apart if not enough of the right cards are picked up. Opening cards like Braids will certainly help the deck, but it can get by as long as the recurring weenie base + disruption package is solid. Remember, the goal is to utilize cards that turn otherwise mutually harmful spells into a lopsided advantage. Also, you must be aware of your mana curve, and have plenty of early game drops to get on the board before you play a ‘pox’ effect. Lastly, playing cards like Pox is all about timing, and playing them effectively will take experience.

Sample Deck Lists:

Black Red Pox

Black White Token Pox

Mono Black

5 Colour Control, a.k.a. “The Deck”

morphling

Superman, crushing dreams since ’98

Introduction:

Perhaps one of the most important decks of all time, The Deck, by Brian Weissman was a U/W five colour control deck that pioneered several concepts for control decks that we still follow today. In the cube, The Deck is perhaps one of the strongest decks one can draft, as long as the drafter is up to the task. As this is one of the hardest decks to draft, players should often draft a core of two to three colours, such as grixis or esper, in case the mana base does not come together. Deciding when to draft this deck usually occurs before you sit down at a table, but it also requires that blue is somewhat open.

Deck Strategy:

moat

You won’t make any friends with this deck…

The Deck aims to have an answer, or silver bullet for every card your opponent could play, and then finish out the game with late game bombs. Designed by Weissman with a U/W core, this revolved around cards like Balance, Moat, Disenchant, permission, and included cards from the other colours such as Gorilla Shaman to deal with other threats. Meanwhile, Weissman would attack opponents hand as well as their board with Mind Twist and Balance, while also filling his hand with draw and tutors. Ultimately, he would lock the opponent out of the game and win with a Serra Angel, which would eventually be replaced by Mophling.

The cube provides drafters with many of these cards, and includes a lot of newer, more powerful options such as planeswalkers (ie – 5 colour planeswalker control!). However, the end goal remains the same: to annihilate your opponent’s board and hand by playing every colour, while constantly building up your own hand size and eventually playing a game ending bomb when your opponent is thoroughly devastated.

Key Picks:

  • Dual lands, – favouring blue/x lands

  • Fetches, stripmine etc., and crucible – Strong in any late game deck, but fetches are critical to this deck, so the stripmine/crucible package slides in easily.

    Coalition Relic ain't no slouch either!

    Coalition Relic ain’t no slouch either!

  • Mana fixing/ramp – usually in the form of artifacts. Chromatic Lantern is an especially high pick!

  • Mass Removal – Balance is very strong, as you will be running almost no creatures. Moat is also fantastic as a mass creature stop-gap.

Best removal of all time?

Best removal of all time?

Draft Strategy:

Lands... My Precious!

Lands… My Precious!

Drafting this deck requires a lot of finesse and a keen eye for resource management. This deck is a blue/white or blue/black deck that is splashing every other colour, which requires a strong mana base. During the draft, fetches will be target number one, followed by duals and shock lands. Meanwhile, mana rocks that produce coloured mana are at a very high premium and demand to be taken. Crucible is also usually a snap draft, along with Wasteland and Stripmine. Following the Key Picks above, the draft will be highly nuanced, balancing removal, permission, card advantage, and utility.

Beyond the obvious MANA, MANA, MANA, players will have to expertly balance out the decks needs. On average, this deck requires 4-5 counterspells, 2-3 tutors, 4+ draw spells/library manipulation cards, 1-2 bombs, and the remaining 10 or so cards divided between answers and powerful spells (you are aiming for 17-18 lands/moxen/mana rocks and 22-23 spells).

Pew Pew!

Pew Pew!

Besides these general numbers, breaking down what to pick is going to be very hard for players and will determine the success of the deck. This is because you will need to consider not only drafting 4cc+ sweepers, but also picking up the necessary cheap removal. While cards like Wrath of God are fantastic, do not skimp on early game removal or your deck will be flattened by agro. Because of this, Balance will be the best removal spell you can draft. Keep in mind that this deck is a “silver bullet” deck, so you will not need 7 different wrath variants because you are prioritizing draw, tutors, and spell recursion. Additionally, place a high premium on cards that are reusable, so that you can continue to build on your card advantage (such as planeswalkers, top, maze of ith, regrowth effects, etc).

Thus, while drafting, build up a solid mana base and secure critical mana fixing. Then take a very thorough approach to building up the key components of the deck, drafting permission, removal, and powerful spells. Make sure to have early game answers, and ways to dig up your silver bullets. Lastly, have ways to replay your spells from the graveyard, as these cards will be far more useful than extra copies of removal. And remember, fetches are your top pick.fetchlands

Weaknesses:

Aggro. Seriously, Red Deck Wins with a splash of land hate, pox.deck with sinkhole and pox, white/x decks built with Armageddon, and also big-red/x decks with wildfires. These decks will ruin your day, and destroy your path to victory. When combating them, identify the cards to save your permission for, sideboard in extra early game removal (pyroclasm is your friend), and get ready for a tough matchup. Against mid-range and control decks you usually can just go “bigger”, and play far more powerful spells.

Conclusion:

The Deck can be drafted in many forms, but ultimately you a playing a blue deck that has collided with a rainbow. Within this strategy exists other three colour control variants, such as grixis and esper. These decks are drafted in a similar manner, but benefit from an easier, more focused draft. Nevertheless, 3-5 colour control decks are some of the strongest decks in the cube, and if drafted expertly and with care, they can compete against any other deck. Just make sure to get your mana base in order quickly, and then branch out to snatch up all the overpowered spells. Your goal is to generate unheard of amounts of card and virtual card advantage, and then end the game at your leisure. Nothing delivers a beating quite like a time-walk/mind-twist/balance, into regrowth, and then yawgmoths will.

Sample Deck Lists:

Blue Heavy, with Aetherling

Finishing with Elesh and Bribery